Hi and welcome to the GIG Logistics Shipping User Guide. This guide will take you through the setup process on your Shopify store. It allows you to seamlessly integrate GIGL Shipping into your store for a fast and easy delivery process for your customers.
The User Guide comprehensively addresses all the essential information required to utilize the GIGL APP for constructing an outstanding store system. Additionally, it provides helpful tips and tricks that enhance your experience, making your work with the APP more convenient and enjoyable
This installation process are of two ways.
- Use this https://admin.shopify.com/oauth/install_custom_app?client_id=a5a71d71b73c3e546909bdeefde3c3a1&no_redirect=true&signature=eyJfcmFpbHMiOnsibWVzc2FnZSI6ImV5SmxlSEJwY21WelgyRjBJam94TnpFeU56a3pPVFl5TENKd1pYSnRZVzVsYm5SZlpHOXRZV2x1SWpvaU5tTTBNVGxoTFRJdWJYbHphRzl3YVdaNUxtTnZiU0lzSW1Oc2FXVnVkRjlwWkNJNkltRTFZVGN4WkRjeFlqY3pZek5sTlRRMk9UQTVZbVJsWldaa1pUTmpNMkV4SWl3aWNIVnljRzl6WlNJNkltTjFjM1J2YlY5aGNIQWlMQ0p0WlhKamFHRnVkRjl2Y21kaGJtbDZZWFJwYjI1ZmFXUWlPakV3TkRrNE1EVXdNbjA9IiwiZXhwIjoiMjAyNC0wNC0xOFQwMDowNjowMi45MDVaIiwicHVyIjpudWxsfX0%3D--50d38b2f8ef90a9311f0fb46ec3ad67e99ddf6bc
- Use this https://gigl.pushtechn.com/gigl-delivery-shipping/install.php?shop=replace-with-your-store-url OR
- Insert your store url bellow
In the account settings, you can do the following:
Note: all field are required, also set mode to live when going live.- After successful installation
- On the account settings form, provide your store location and login credential to your GIGL account.
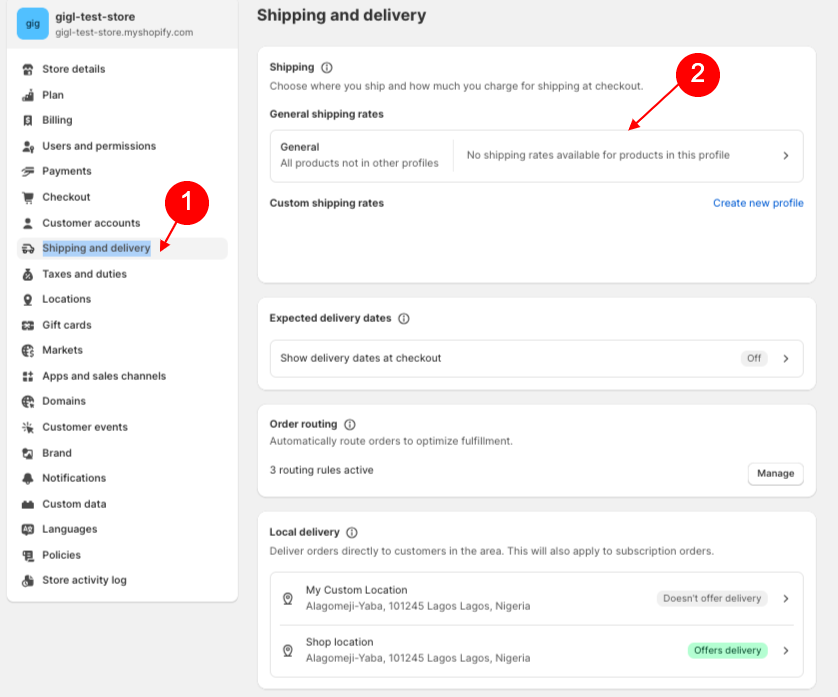
In the Shipping settings, you can do the following:
- After the completion of the account setting
- Create a custom shipping rate OR continue with general shipping rate
- If custom shipping rate, select and add appropiate product to the custom shipping rate then save
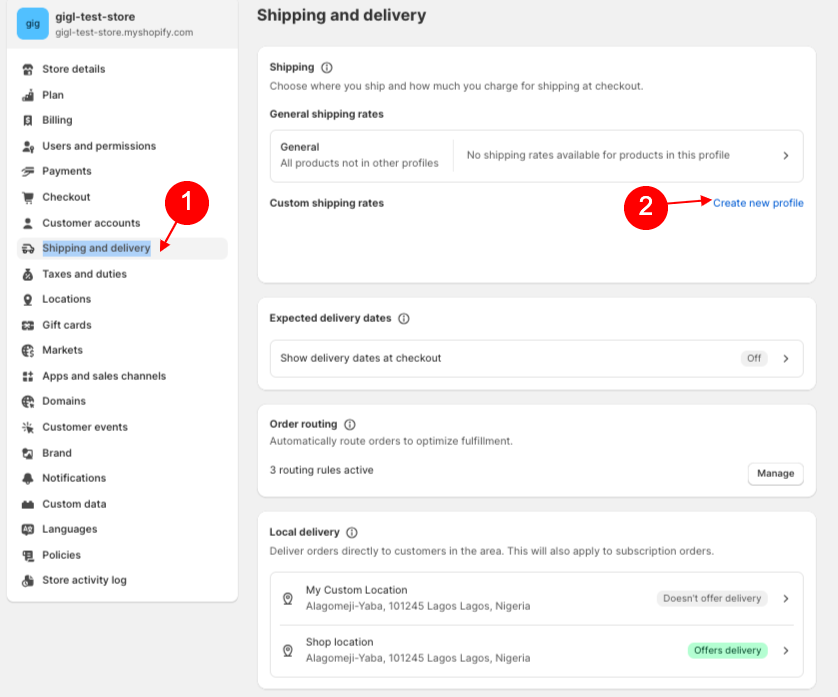 Create custom shipping rate
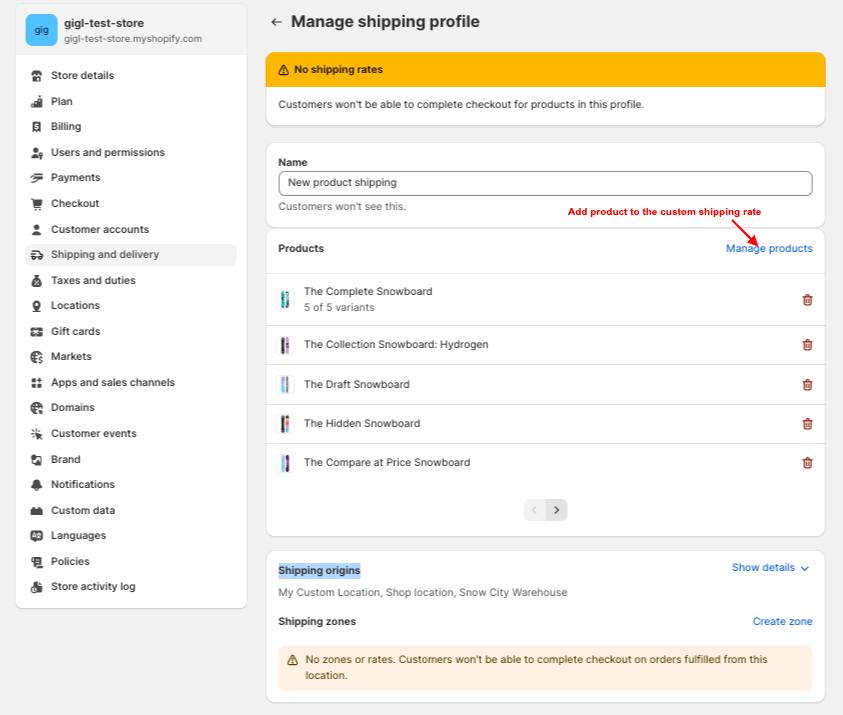 Add appropiate product to custom shipping rate
 General shipping rate
Adding GIGL APP
Add a menu to an existing one or create a new menu. Go to "Appearance > Menu" click "Add New" to create a menu, and then click "Add to Menu" to modify an existing menu.- Navigate to custom shipping rate OR general shipping rate
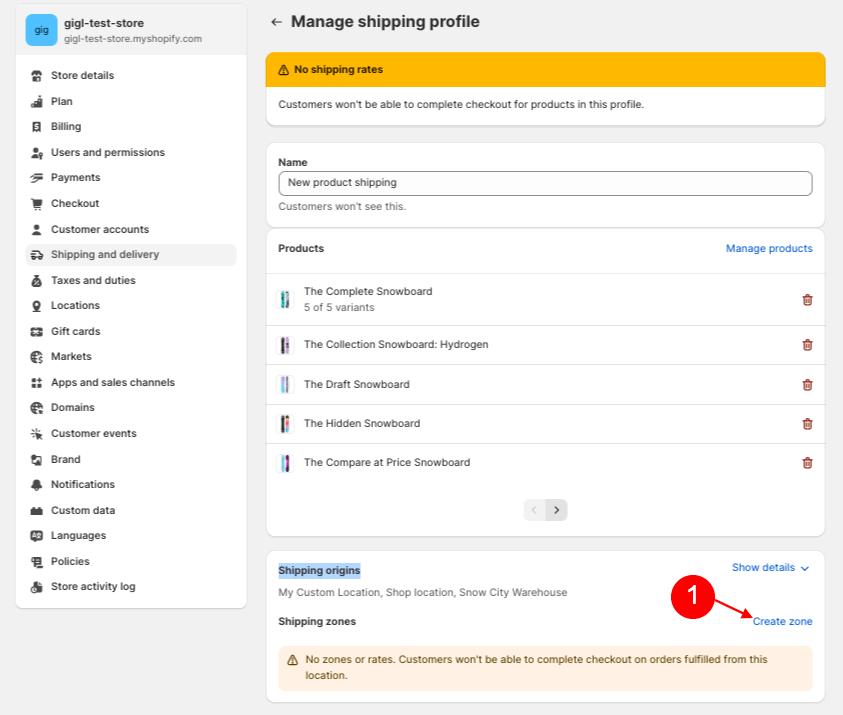
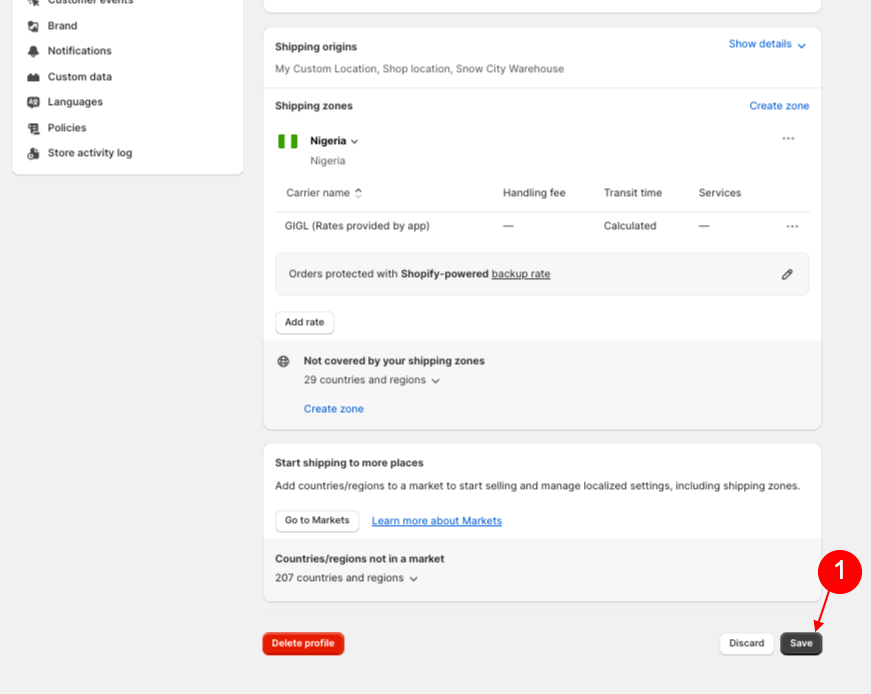
- Navigate to Shipping origins section
- Create new zone
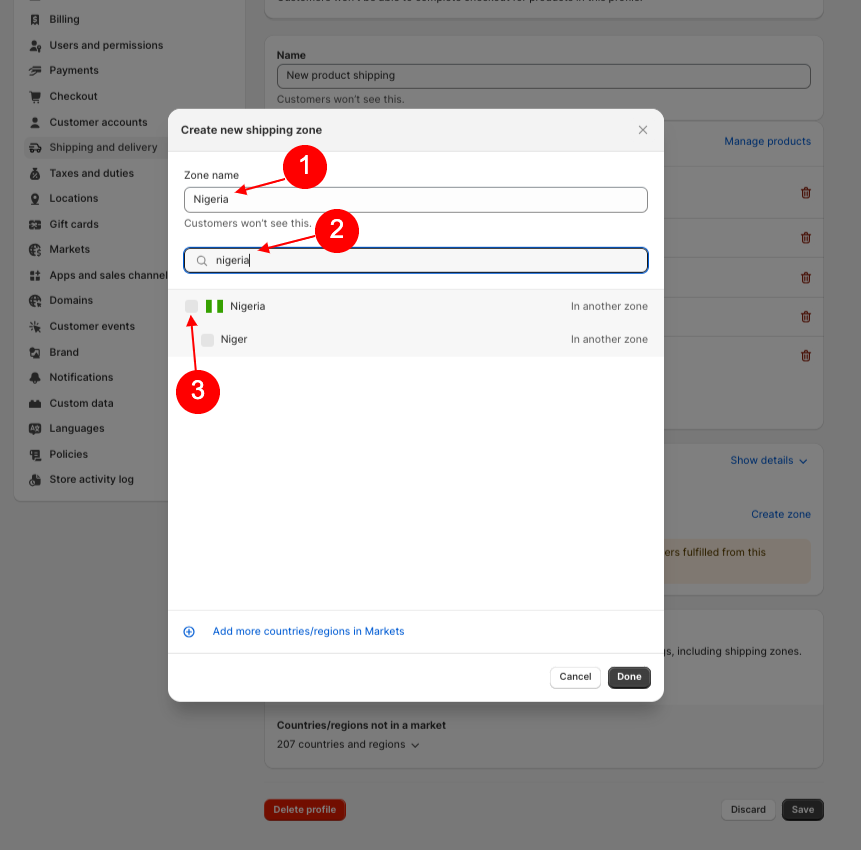
- Input zone name and Scroll down / search to select nigeria then click on done
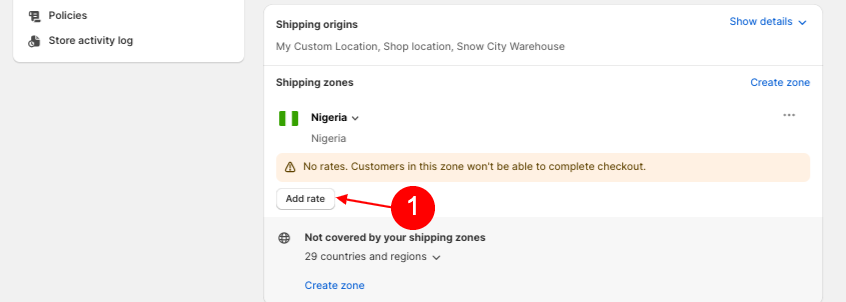
- Create new rate
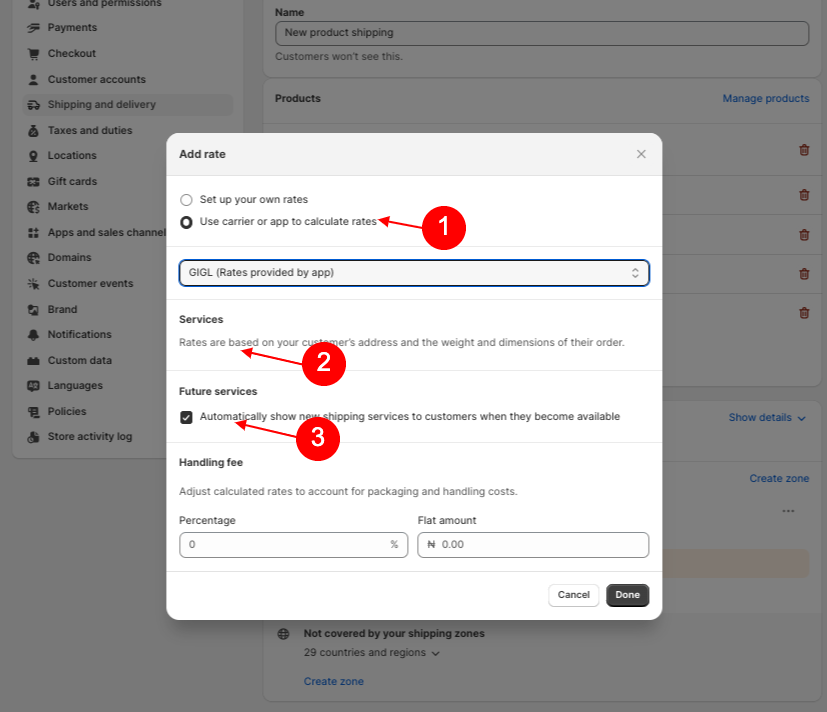
- Select use carrier or app to calculate rates
- Select GIGL (Rate provided by app) in the select option
- Check the services (rates are based on your customer's address) if available
- Check the feature services (automatically show shipping services to customers when they become available)
- Click on the done
- On the custom / general shipping rate click save to effect all changes